Set Up Triggers
What You'll Learn
- How to configure cron-based recurring triggers to run your pipeline on a schedule
- How to configure backfill triggers to reprocess historical time windows
- How to monitor your triggers and pipeline runs through the UI
Prerequisites
Before you get started, make sure you have the following in place:
- Michelangelo CLI (
ma) installed — You'll use the CLI to register and manage your triggers. If you haven't set it up yet, see the CLI guide for installation instructions. - A running sandbox environment with a project configured — Triggers run inside a project (set via the
namespacefield in your YAML), so you'll need your sandbox environment up and running. Check out the Sandbox Setup Guide if you need help with this. - A registered pipeline with at least one revision — Triggers are linked to a specific pipeline revision, so make sure your pipeline is registered before continuing. See Train and Register a Model for a walkthrough.
- Access to MA Studio UI (optional) — The Studio UI is handy for monitoring your triggers and pipeline runs, but it's not required to complete the setup.
Once you have these ready, you're all set to create your first trigger!
Setting Up a Cron Trigger
1. Register the Pipeline
Before you can set up a trigger, you'll need a registered pipeline with at least one revision. Registering creates the pipeline entity in the system, and your trigger will be linked to a specific revision of that pipeline.
If you haven't registered your pipeline yet, head over to the Train and Register a Model guide to get that set up first.
2. Create Your trigger.yaml
Next, you'll create a YAML file that tells the system when and how to run your pipeline. This file is called a TriggerRun resource, and it connects a cron schedule to your registered pipeline revision.
Here's a complete example you can copy and customize:
apiVersion: michelangelo.api/v2
kind: TriggerRun
metadata:
  name: training-pipeline-daily-trigger
  namespace: ml-team                    # Your project name
spec:
  # Which pipeline and revision to run
  pipeline:
    name: training-pipeline
    namespace: ml-team
  revision:
    name: rev-2024-03-01
    namespace: ml-team

  # Trigger configuration
  trigger:
    cron_schedule:
      cron: "0 9 * * 1-5"       # Runs at 9:00 AM on weekdays

    # How many pipeline runs can execute at the same time (optional)
    # Set to 0 or omit for sequential batch execution
    max_concurrency: 3

    # Control how runs are grouped into batches (optional)
    batch_policy:
      batch_size: 10             # Runs per batch (default: 10)
      wait: "600s"               # Pause between batches (default: 600s)

  actor:
    name: "your-username"
Tip: The cron expression uses the standard 5-field format:
minute hour day-of-month month day-of-week. For example,"0 9 * * 1-5"means "every weekday at 9 AM." If you're testing and want runs every minute, you can temporarily use"* * * * *"— just remember to change it before going to production!
Understanding the Key Fields
| Field | Description |
|---|---|
spec.pipeline | The pipeline you want to trigger, identified by name and namespace (your project). |
spec.revision | The specific pipeline revision to run. In the future, you'll be able to set auto_flip: true at the spec level to always use the latest revision — see Automatic Revision Tracking (preview) for details. |
spec.trigger.cron_schedule.cron | A standard cron expression that controls the schedule. |
spec.trigger.max_concurrency | Maximum simultaneous pipeline runs. When set above 0, runs execute concurrently. When 0 or omitted, runs execute in sequential batches. |
spec.trigger.batch_policy | Controls batching: batch_size sets how many runs per batch (default: 10), and wait sets the pause between batches (default: 600 seconds). Ignored when max_concurrency is set above 0. |
spec.actor.name | Your username — identifies who created the trigger. |
Tip: If you need to run the same pipeline with different configurations (for example, one run per region), check out Parameterized Triggers in the Advanced Configuration section below.
3. Register Your Trigger with the CLI
Now that your trigger.yaml is ready, you can use the Michelangelo CLI to register and manage it. Here are the commands you'll need:
| Action | Command |
|---|---|
| Create or update a trigger | ma trigger_run apply --file=<path_to_trigger.yaml> |
| Check trigger status | ma trigger_run get --namespace=<ns> --name=<name> |
| List all triggers | ma trigger_run list --namespace=<ns> |
| Delete a trigger | ma trigger_run delete --namespace=<ns> --name=<name> |
| Kill a running trigger | ma trigger_run kill --namespace=<ns> --name=<name> |
A few things to keep in mind:
applyhandles both creation and updates. If a trigger with the same name already exists,applywill update it with your new configuration.killvsdelete: Usekillto stop a running trigger (it sets a kill flag and cleanly terminates the workflow). Usedeleteto remove the trigger resource entirely.killwill ask for confirmation before proceeding. Add--yesto skip the prompt (useful in scripts).
For the full list of CLI options and flags, see the CLI reference guide.
4. Monitor Your Trigger
Once your trigger is registered, the system starts executing pipeline runs on schedule. You can keep an eye on things through a couple of different UIs.
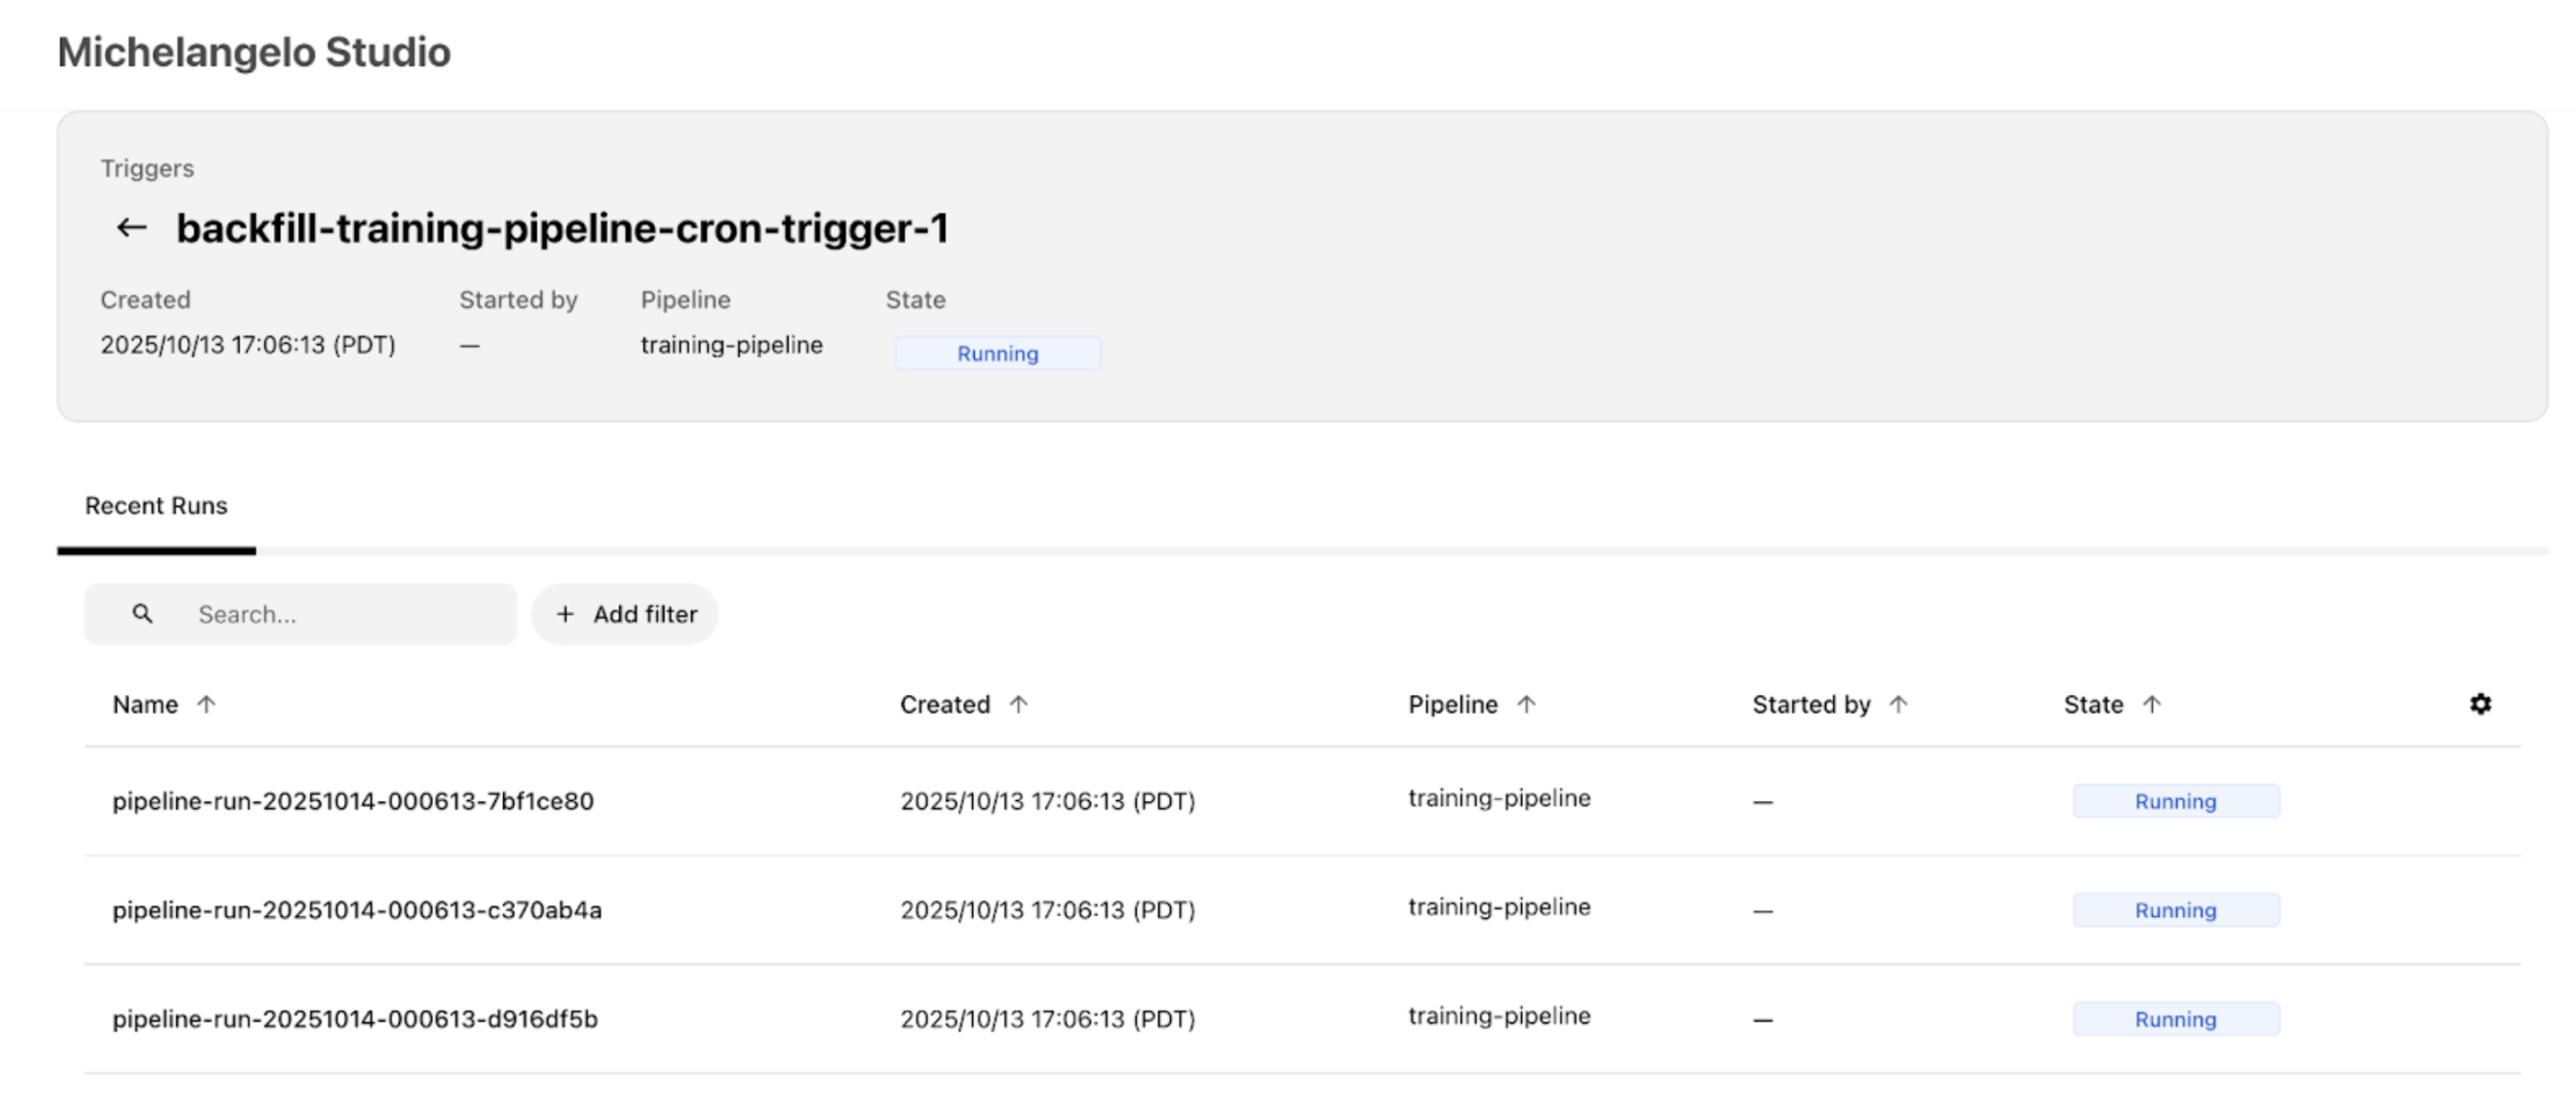
- MA Studio UI: Open your project in MA Studio (in a local sandbox, that's typically
http://localhost:8090/<your-project>). Look for your trigger under the Triggers section — you should see it in a running state with recent pipeline runs listed. Click on a trigger to open its detail page, where you can see the Recent Runs list, current state, schedule, and configuration.
-
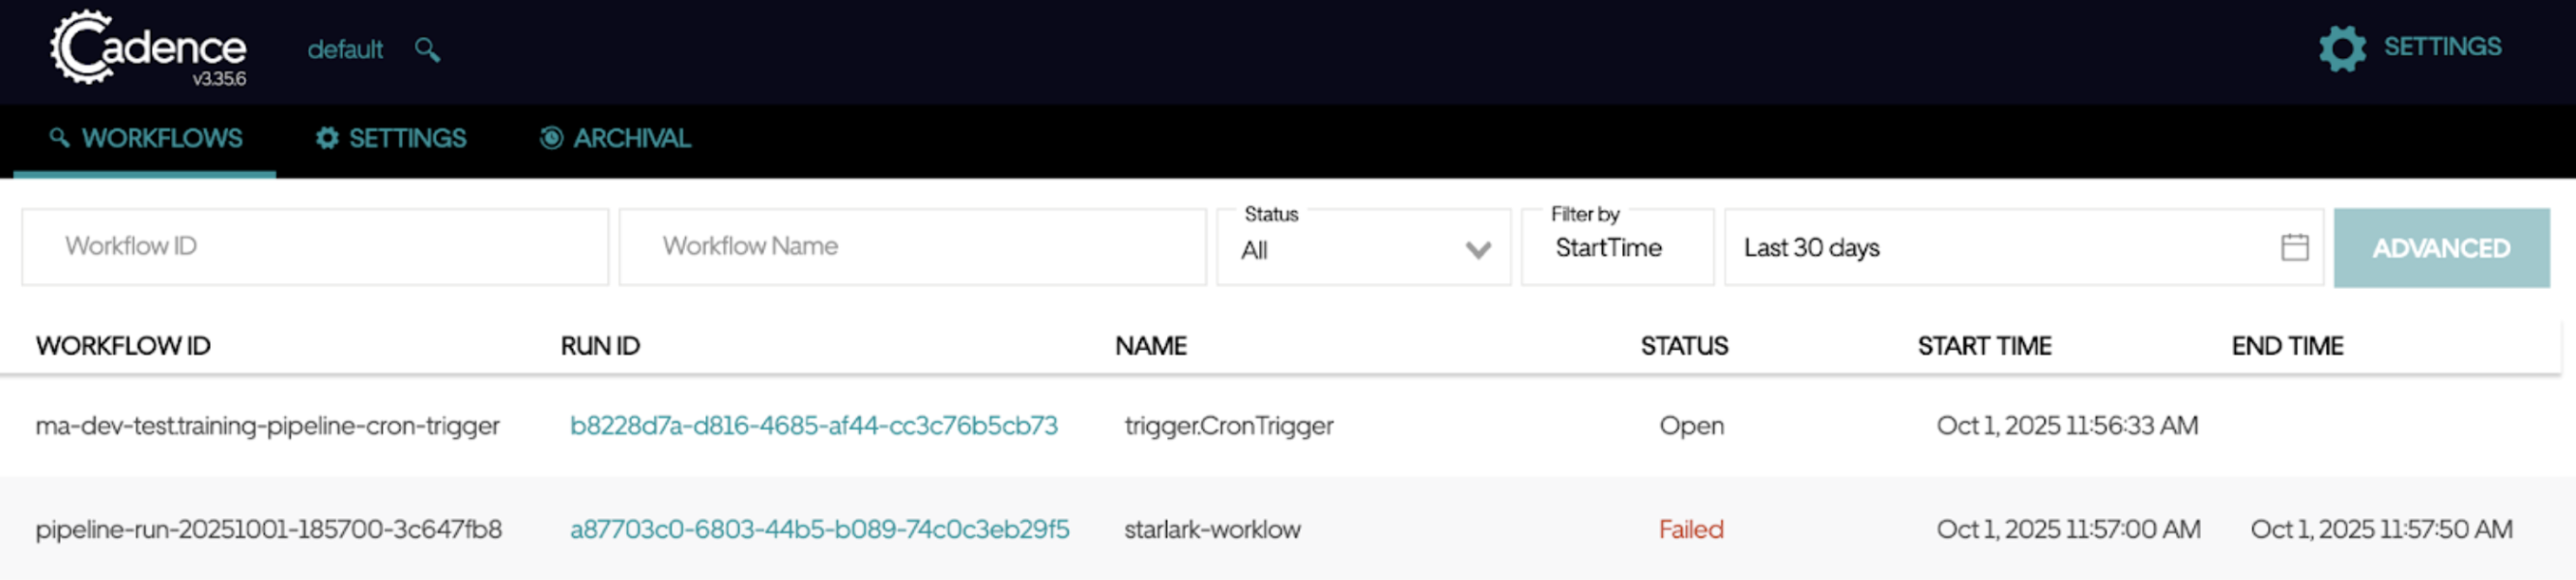
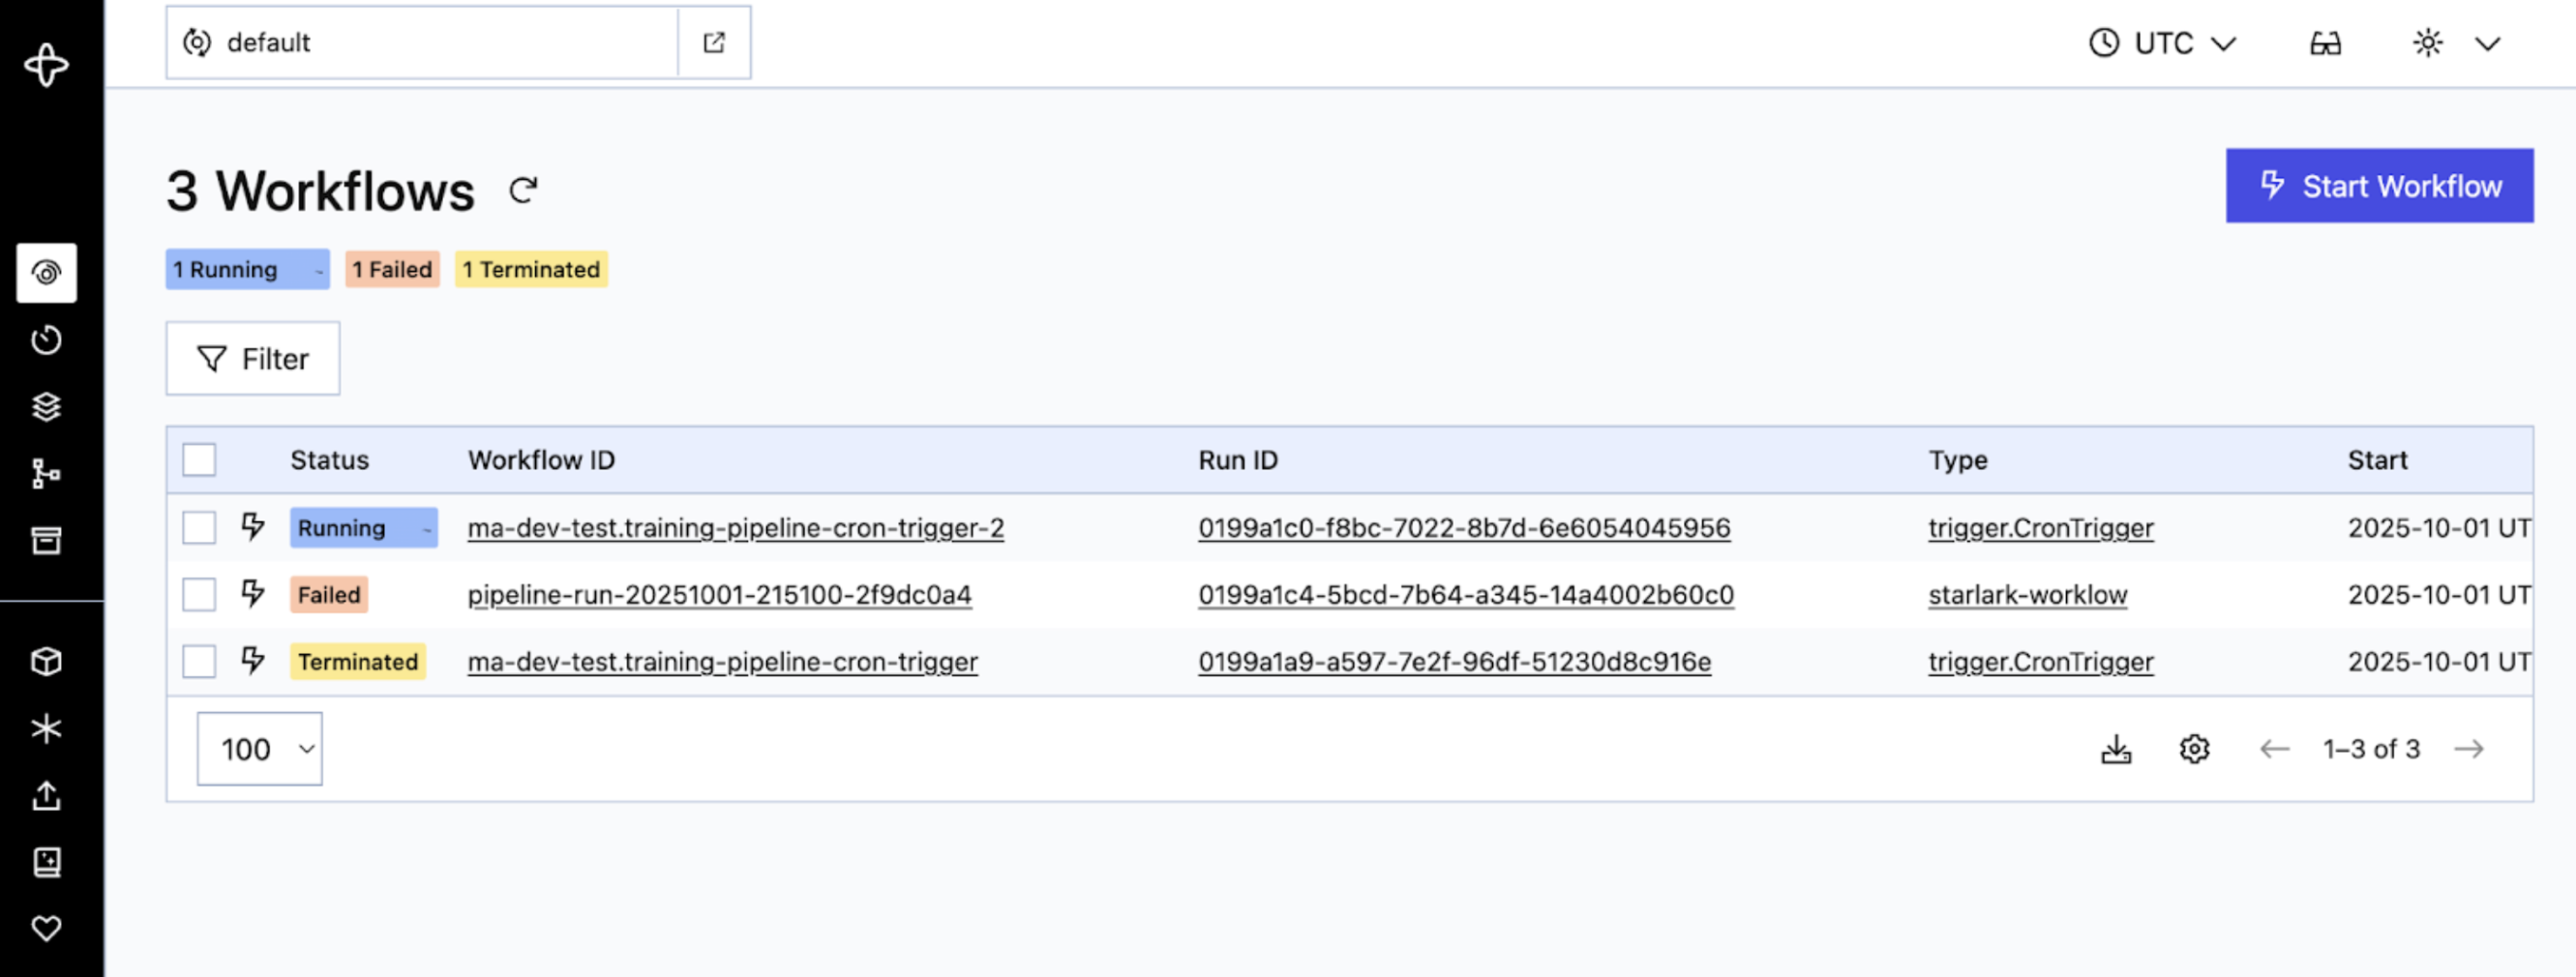
Workflow Engine UI (Cadence/Temporal): For a deeper look at what's happening under the hood, you can check the workflow engine UI. In a local sandbox, this is typically:
- Cadence:
http://localhost:8088/domains/default - Temporal:
http://localhost:8080/domains/default
Your trigger shows up as an "Open" or "Running" workflow (look for
trigger.CronTrigger). This workflow continuously generates child pipeline runs based on your cron schedule. You can expand a workflow to see individual activities and their execution times. - Cadence:

Setting Up a Backfill Trigger
A backfill trigger lets you run your pipeline over a historical time window — for example, reprocessing data from the past week. The setup follows the same steps as a cron trigger, with one addition: you specify a start and end timestamp that defines the time range to backfill.
The system looks at your cron schedule and creates a pipeline run for each cron cycle that falls within that window. Both boundaries are inclusive, so if a scheduled time lands exactly on the start or end timestamp, it will still trigger a run.
Here's a complete backfill example:
apiVersion: michelangelo.api/v2
kind: TriggerRun
metadata:
  name: training-pipeline-backfill-jan
  namespace: ml-team                    # Your project name
spec:
  pipeline:
    name: training-pipeline
    namespace: ml-team
  revision:
    name: rev-2024-03-01
    namespace: ml-team

  # Define the backfill time window (both boundaries are inclusive)
  start_timestamp: "2024-01-01T09:00:00Z"
  end_timestamp: "2024-01-07T09:00:00Z"

  trigger:
    # The cron schedule determines which timestamps get pipeline runs
    cron_schedule:
      cron: "0 9 * * *"         # Daily at 9:00 AM

    max_concurrency: 2

    batch_policy:
      batch_size: 5
      wait: "600s"

  actor:
    name: "your-username"
In this example, the cron schedule is "daily at 9 AM" and the window covers January 1-7. That means the system creates 7 pipeline runs — one for each day at 9:00 AM. If you also have parameters_map entries, the total is multiplied (7 days x 2 parameter sets = 14 runs).
Tip: Make sure your time window actually includes at least one cron cycle. For example, if your cron runs weekly on Saturdays (
"0 9 * * 6"), a window from Monday to Friday won't generate any runs!
Advanced Configuration
Automatic Revision Tracking (auto_flip) — Preview
Note: The
auto_flipfield is available in the YAML schema and UI, but the runtime logic that automatically switches to newer revisions is not yet active. For now, please continue pinning your triggers to a specific revision. We're including this section so you know what's coming.
By default, a trigger is pinned to the specific pipeline revision you set in spec.revision. Once auto_flip is fully active, setting auto_flip: true will let your trigger automatically pick up the latest pipeline revision whenever a new one is registered. This is especially useful in production environments — your triggers will automatically get improvements, bug fixes, and updated logic without any manual intervention, reducing operational overhead.
Here's what the configuration will look like:
apiVersion: michelangelo.api/v2
kind: TriggerRun
metadata:
  name: training-pipeline-daily-trigger
  namespace: ml-team                    # Your project name
spec:
  pipeline:
    name: training-pipeline
    namespace: ml-team
  revision:
    name: rev-2024-03-01               # Starting revision (will auto-update when feature is active)
    namespace: ml-team

  # Automatically use the latest pipeline revision (preview — not yet active)
  auto_flip: true

  trigger:
    cron_schedule:
      cron: "0 9 * * 1-5"

  actor:
    name: "your-username"
When to Use auto_flip (Once Active)
| Scenario | Recommendation |
|---|---|
| Production pipelines that should automatically stay current with the latest code, bug fixes, and improvements | Use auto_flip: true |
| Stable production pipelines that should automatically receive platform library updates, security patches, and framework upgrades | Use auto_flip: true |
| Teams that want to reduce operational overhead by not manually updating trigger revisions | Use auto_flip: true |
| You need reproducible runs tied to a known-good version | Pin to a specific revision (auto_flip: false or omit) |
| Changes require approval or review before running in production (compliance, auditing) | Pin to a specific revision |
Tip: Even when
auto_flipis fully active, you'll still need to provide an initialspec.revision. The trigger will start with that revision and switch to newer ones as they become available.
Parameterized Triggers
If you need to run the same pipeline with different configurations — for example, training separate models for different regions — you can use parameters_map. Each entry in the map creates its own pipeline run on every cron cycle.
Here's an example that trains two regional models on every trigger:
spec:
  trigger:
    cron_schedule:
      cron: "0 9 * * 1-5"
    parameters_map:
      us_east_model:
        environ:
          REGION: "us-east"
        kw_args:
          learning_rate: 0.01
      eu_west_model:
        environ:
          REGION: "eu-west"
        kw_args:
          learning_rate: 0.005
With this setup, every weekday at 9 AM the trigger creates two pipeline runs — one for each parameter set.
How Parameters Work
Each entry in parameters_map is a set of PipelineExecutionParameters that gets passed to its own pipeline run. You can configure:
| Field | Description |
|---|---|
environ | Environment variables passed to the pipeline (key-value pairs) |
kw_args | Keyword arguments passed to your pipeline tasks |
args | Positional arguments (less common, for specialized use cases) |
Batching with Parameters
When you have many parameter sets, the batch_policy controls how runs are grouped and paced. For example, if you have 50 parameter sets with batch_size: 10 and wait: "600s", the system creates 5 batches of 10 runs each, pausing 10 minutes between batches.
If you set max_concurrency instead, the system ignores batch_policy and runs up to that many pipeline runs at the same time.
Configuring Notifications
You can set up your trigger to send notifications when important events happen — like a pipeline run failing or a trigger completing successfully. Notifications can be sent via email or Slack, so your team stays informed without having to watch the UI.
Here's an example that sends an email when a pipeline run fails, and a Slack message when the trigger completes successfully:
spec:
  notifications:
    # Email alert on pipeline run failure
    - notification_type: 1              # 1 = Email
      event_types: [3]                  # 3 = Pipeline run failed
      resource_type: 2                  # 2 = TriggerRun
      emails:
        - "team-alerts@example.com"
        - "your-email@example.com"

    # Slack message on trigger success
    - notification_type: 2              # 2 = Slack
      event_types: [7]                  # 7 = Trigger run succeeded
      resource_type: 2                  # 2 = TriggerRun
      slack_destinations:
        - "#ml-pipeline-alerts"
Add the notifications block under spec in your trigger YAML, alongside your pipeline, revision, and trigger fields.
Supported Event Types
You can notify on any combination of these events:
| Event | ID | Description |
|---|---|---|
| Pipeline run succeeded | 1 | A pipeline run completed successfully |
| Pipeline run killed | 2 | A pipeline run was manually terminated |
| Pipeline run failed | 3 | A pipeline run encountered an error |
| Pipeline run skipped | 4 | A pipeline run was skipped |
| Trigger run killed | 5 | The trigger itself was terminated |
| Trigger run failed | 6 | The trigger encountered an error |
| Trigger run succeeded | 7 | The trigger completed all scheduled runs |
| Pipeline state ready | 8 | The pipeline is in a ready state |
| Pipeline state error | 9 | The pipeline has entered an error state |
Notification and Resource Types
| Field | Value | Meaning |
|---|---|---|
notification_type | 1 | |
notification_type | 2 | Slack |
resource_type | 1 | PipelineRun |
resource_type | 2 | TriggerRun |
resource_type | 3 | Pipeline |
Tip: A common setup is to notify on failures via email (for immediate attention) and on successes via Slack (for team visibility). You can list multiple
event_typesin a single notification entry to consolidate alerts.
Pipeline Manifest Triggers (trigger_map)
So far, we've been defining triggers as standalone trigger.yaml files. But there's another option: you can define triggers directly inside your pipeline manifest using the trigger_map field. This keeps your trigger configuration right next to your pipeline definition — everything in one place.
Here's what it looks like in a pipeline manifest:
apiVersion: michelangelo.api/v2
kind: Pipeline
metadata:
  name: training-pipeline
  namespace: ml-team                    # Your project name
spec:
  manifest:
    trigger_map:
      daily_training:
        cron_schedule:
          cron: "0 9 * * 1-5"
        max_concurrency: 2
      weekly_full_retrain:
        cron_schedule:
          cron: "0 2 * * 0"            # Sundays at 2 AM
        max_concurrency: 1
Each key in trigger_map (like daily_training or weekly_full_retrain) becomes a named trigger. You can define multiple triggers for the same pipeline, each with its own schedule and settings.
When to Use trigger_map vs Standalone trigger.yaml
| Approach | Best for |
|---|---|
trigger_map in pipeline manifest | Triggers that are tightly coupled to the pipeline and should be versioned together. Great when the trigger is a natural part of the pipeline definition. |
Standalone trigger.yaml | Triggers that need to be managed independently, updated without re-registering the pipeline, or shared across revisions. Also required for backfill triggers with start_timestamp/end_timestamp. |
Tip: You can use both approaches together. For example, define your regular cron schedule in the pipeline manifest with
trigger_map, and use a standalonetrigger.yamlwhen you need to run a one-off backfill.
Trigger States
As your trigger runs, it moves through different states. Understanding these states helps you monitor your triggers and troubleshoot any issues.
| State | Description |
|---|---|
| RUNNING | The trigger is active and creating pipeline runs on schedule. This is the normal operating state. |
| SUCCEEDED | The trigger completed all its scheduled runs successfully. For backfill triggers, this means the entire time window has been processed. |
| FAILED | Something went wrong and the trigger couldn't complete. Check the trigger details for error information. |
| KILLED | The trigger was manually stopped using ma trigger_run kill. |
| PENDING_KILL | A kill request has been sent but the trigger hasn't fully stopped yet. It will transition to KILLED shortly. |
| INVALID | The trigger configuration has a problem — for example, a missing pipeline or revision. Review your trigger.yaml for errors. |
How States Transition
Here's the typical flow:
- When you register a trigger, it enters the RUNNING state and begins creating pipeline runs.
- If everything goes well, a backfill trigger moves to SUCCEEDED when it finishes. Cron triggers stay in RUNNING until stopped.
- If you run
ma trigger_run kill, the trigger moves to PENDING_KILL and then to KILLED. - If an error occurs, the trigger moves to FAILED.
Checking Your Trigger's State
You can check the current state of any trigger with the CLI:
ma trigger_run get --namespace=<ns> --name=<name>
The output includes the trigger's current state, recent pipeline runs, and any error details. You can also see trigger states in the MA Studio UI under the Triggers section of your project.
Troubleshooting
Running into issues? Here are a few common things to check:
- Trigger not starting? Make sure your pipeline is registered and the revision name in your
trigger.yamlmatches exactly. You can verify withma trigger_run get --namespace=<ns> --name=<name>. - CLI command failing? Double-check that your sandbox is running and your project exists. See the Prerequisites section above.
- Cron not firing when you expect? Verify your cron expression is correct — the 5-field format can be tricky. crontab.guru is a handy tool for testing expressions.
- Pipeline runs not showing up in the UI? Check the trigger state with
ma trigger_run get. If the trigger is in aFAILEDorINVALIDstate, the output will include details about what went wrong.
Coming Soon
We're working on additional trigger types to give you even more flexibility:
- Interval Schedule — Trigger pipeline runs at a fixed time interval (for example, every 2 hours) instead of using cron expressions. Great for simple, recurring schedules.
- Batch Rerun — Rerun a set of failed pipeline runs in bulk, with the option to resume from a specific point in the pipeline DAG. Useful for recovering from transient failures without reprocessing everything.
These features are defined in the system but not yet fully available. Stay tuned for updates!
What's Next
Now that your triggers are set up, here are some useful next steps:
- Dive deeper into ML Pipelines to learn about the pipeline framework your triggers are running
- Learn about different Pipeline Running Modes to understand how your pipelines execute
- Explore Caching and Pipeline Resume to speed up repeated runs
- Check out the full CLI Reference for additional trigger management commands